









A8900 Merchant Quick Guide
1. Power On
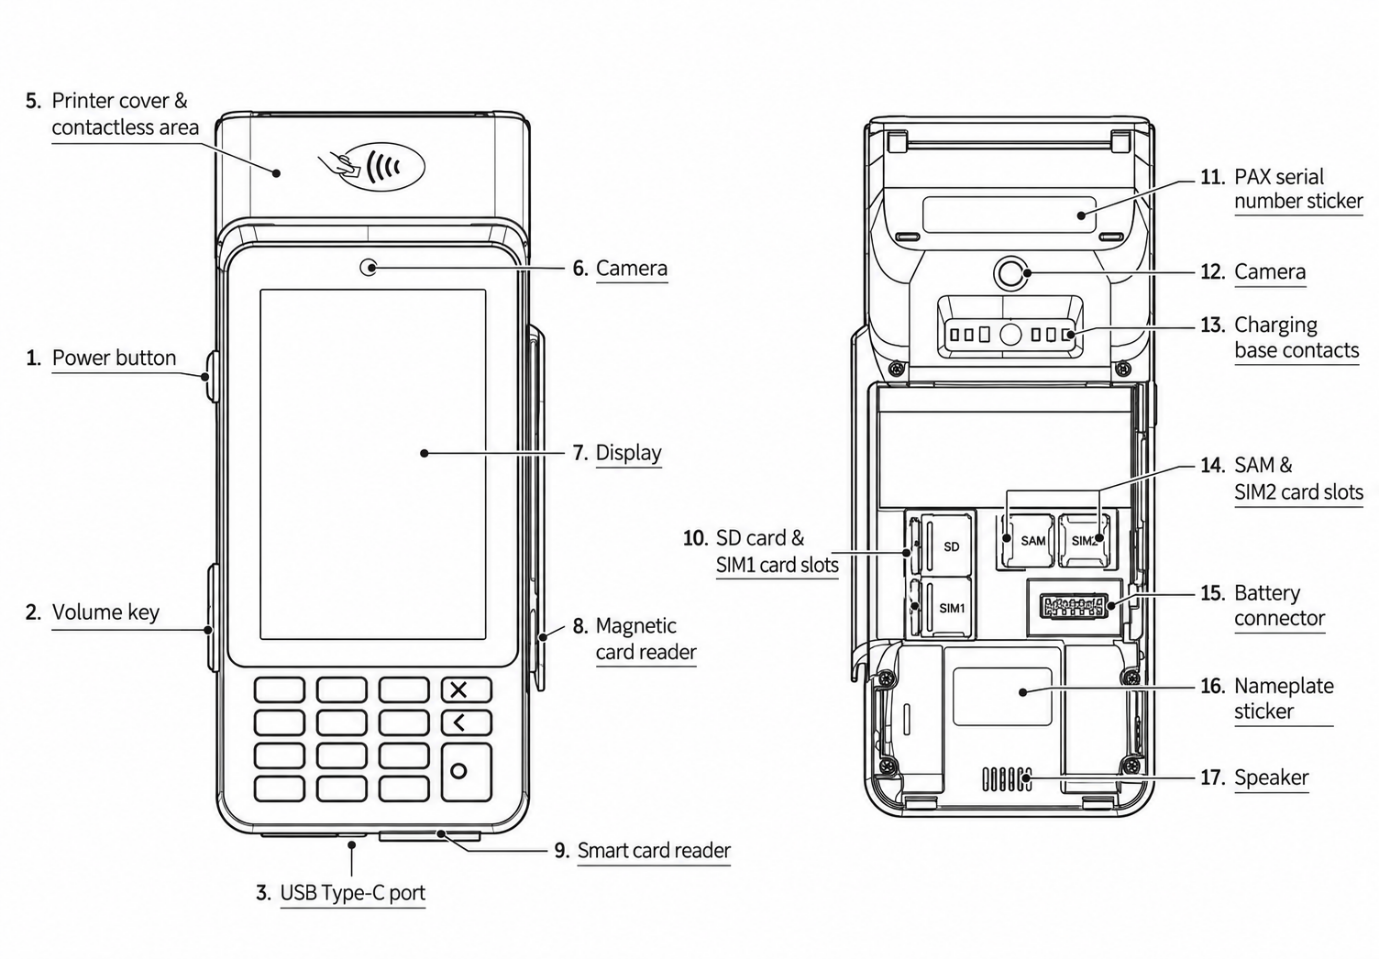
Press and hold the Power button until the PAX logo appears and the terminal starts.
2. Charging the Terminal
Connect the supplied USB-C cable to the terminal. Connect the other end to the supplied power adaptor and plug it into a wall outlet.
Power adaptor output: 5 V / 2 A maximum.
3. Loading Receipt Paper
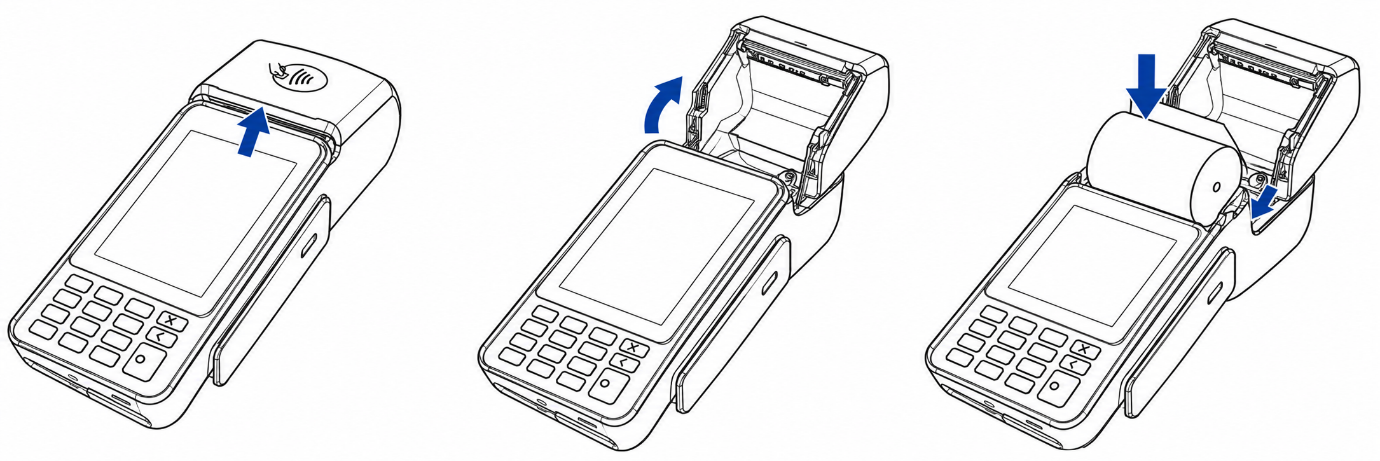
- Open the printer cover by lifting the cover from the middle.
- Remove the old paper roll if one is installed.
- Place a new thermal paper roll into the printer compartment.
- Leave a short length of paper outside the printer and close the cover.
- Tear off the excess paper against the tear bar.
4. Rear Camera
The rear camera is used by supported applications to scan common 1D and 2D codes, including barcodes and QR codes. No special merchant setup is required for the camera.
5. Payment Methods Supported
- Magnetic stripe card
- Chip / smart card
- Contactless / NFC card or device
- QR / barcode transactions when supported by the payment application
Contact PAX Technology Australia
Address: Level 5, 26 Talavera Road, Macquarie Park, NSW 2113, Australia
Tel: +61 413 841 534
Support: swsupport@paxtech.com.au
Website: www.paxtech.com.au
PAX Technology Australia (PTA) continually invests to maintain its high-quality products up to date with the latest certifications. A comprehensive list can be requested via the website’s contact form or downloadable product brochures.
